
The GoG version of Oblivion is DRM free and thus the simplest version of Oblivion to work with. Plus GoG gives you downloadable installers! This guide does make some assumptions so lets start with that.
I. Prerequisites
This guide assumes the following:
- You are using Linux atm, this isn't a how to use Linux guide. There's endless guides for that.
- You're running a newish version of WINE/updated your system recently enough.
- You have ever used the shell/command prompt/terminal in your life. You don't need to be a wizard at it, just slightly familiar enough with how it works.
- You know how to install programs.
- You know what GPU you have, this will be important later.
- You have the GoG version. This guide isn't really applicable to the CD or Steam versions.
II. Goals
This guide is fairly straight forward. It discusses installing Oblivion through WINE, managing different WINEPREFIXes, how to isolate WINEPREFIXes, and how to get Oblivion up and running like its nothing. This guide is not a guide on how to mod Oblivion in WINE, a comprehensive guide on WINE, or a guide for any other version of Oblivion. With that out of the way lets start with some background so you have a better understanding of what WINE is and how we can use it to our advantage.
III. WINE
WINE, standing for WINE Is Not an Emulator, is a compatibility layer that replicates the core functionality of Windows to run Windows programs and libraries for non-Windows operating systems. It has support for many different OSes but we’re going to be looking at Linux in particular. Windows and Linux not only have vastly different core functionality, but their filesystems are set up very differently. To remedy this issue, WINE creates WINEPREFIXes that are essentially a bottle containing a Windows file system. This, in the context of WINE, is the “C:” drive. If you install a program with WINE to the C: drive it will go to the prefix. The prefix folder contains some system files and the folder “drive_c”. That is your “C:” drive, anything installing to the C: drive will go inside that folder.
WINE creates a default WINEPREFIX called “~/.wine” which means it creates a hidden folder named wine to your home directory. If you just open or install a Windows program it will install to that directory. For general use that is perfectly fine, I use that WINEPREFIX all the time. But problems can arise if you want to increase compatibility with other programs. You might end up bloating your main WINEPREFIX and chase problems more than you’d want to. That’s why I believe that one should create specific prefixes. Want to have multiple Oblivion installs? Make multiple WINEPREFIXes! It’s that simple (don’t worry if you don’t know how to do that, I’ll help you out later in the guide).
There is a slight problem though. WINE devs want programs that run through WINE to feel as native as possible. To do that they actually symbolically link the Windows “My Documents” page to the standard XDG Documents page (usually just called Documents). This makes multiple installs of the same program a bit tricky. Fortunately, the suplementary program Winetricks has a feature that allows us to “isolate home”, our home directory. We can use that feature to give us unlimited installs!!
IV. The Guide Part
Now that the supplementary information is out of the way, lets get to the guide!
1. Download the Installers
The first thing we wanna do is to get the installer files. GoG really wants you to go through GoG Galaxy for this, but that doesn’t have a Linux version. Instead, go to https://www.gog.com/account and find Oblivion.
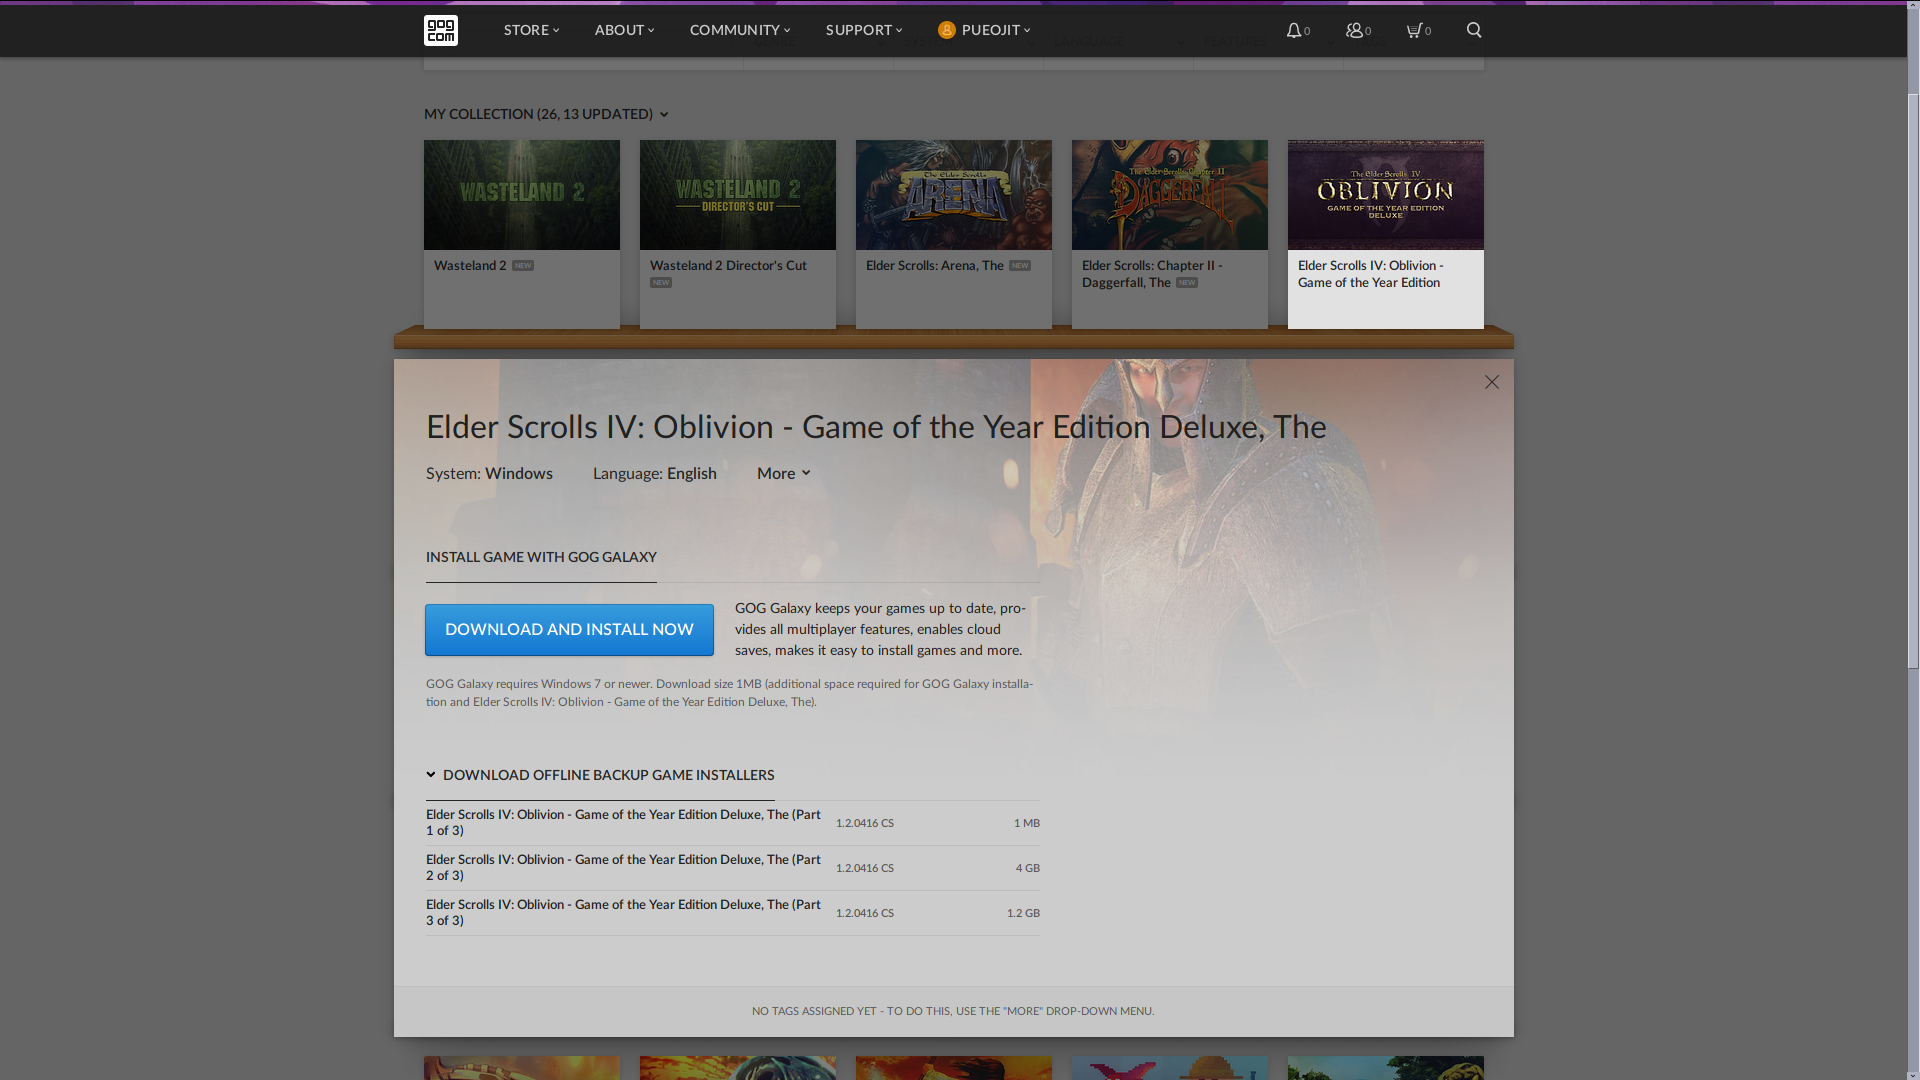
Click on it, then scroll to the bottom and download every file to some folder of your choosing.
2. Create a WINEPREFIX and Install Oblivion
The next thing we want to do is to create a WINEPREFIX with the name of our choosing. Open up your terminal, either with your application menu or with the shortcut ‘CTRL+ALT+T’. From there enter the following:
WINEPREFIX=~/.'your name' winecfgwith ‘your name’ being some one word prefix name (no spaces). A window will show up, just close it for now.
Now that the prefix is created, let’s install Oblivion.
While using the terminal, cd into where you downloaded the files from earlier.
If you’re confused with where that is, find it in your file manager then type either in your terminal:
cd "~/your directory/"if you installed it somehere in your home directory (like Downloads) or
cd "/your not home directory/"including the quotations in either example.
Once there, we can install the game. To run the installer, enter:
WINEPREFIX=~/.'your prefix' wine setup~~~.exeThe setup program is very long and can’t be renamed, so the best thing to do is to enter everything up to wine then type setup and hit tab.
As long as you don’t have any other files besides the ones we downloaded named ‘setup’ it should give you most of the rest of the name.
After that add .exe to the end so we got the right file and hit enter. If that’s too confusing then just copy the .exe file’s name and use that instead.
The GoG installer should pop up after the language selection.
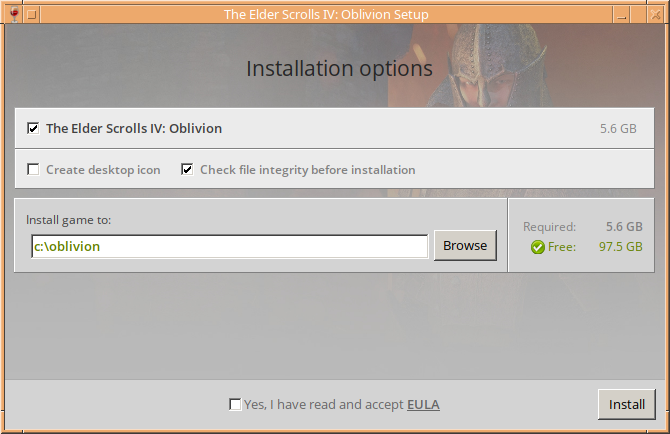
Check either of the middle 2 checkboxes and then modify your Oblivion install folder.
There’s two options for this. As said earlier, the C: drive will install to your WINEPREFIX. If that’s what you want, change location name to c:\oblivion so its not buried into a deeper folder.
Otherwise hit “Browse” and go to whatever folder you desire and install there. Remember where that is for later.
Then check the EULA agreement and install the game!
3. Managing Your Game Install
Since we installed to a specific WINEPREFIX and might want to isolate home, we can’t just run the game like we would for any Linux game. The best way to do that is to create a shell script. A shell script lets you run a dedicated file that uses your shell to run whatever. In this case we want to do a few things:
1. Potentially isolate our home directory from the prefix.
2. cd into the folder Oblivion was installed in.
3. Run Oblivion through our WINEPREFIX.
This is fairly trivial so lets walk through how to do that.
First, create a new text file however you please in a folder you like, name it something reasonable with no spaces, then open it.
Before anything, type #!/bin/'your shell', with ‘your shell’ usually being bash but it might be different, check with your distro if the script doesn’t work at all.
This line tells Linux that when it’s executing it is going to use the program “bash” found in the folder “/bin”.
Essentially we will be writing a program that inputs lines of code for us!.
From there we can enter our code:
      WINEPREFIX=~/.'your prefix' winetricks isolate_home
      cd 'wherever you installed oblivion'
      WINEPREFIX~/.'your prefix' wine OblivionLauncher.exe
The first line isolates the home directory, this can be ignored if you don’t want it. The second line goes to the directory you installed Oblivion, with the last line running it through the WINEPREFIX you made earlier.
Your code should look something like this:
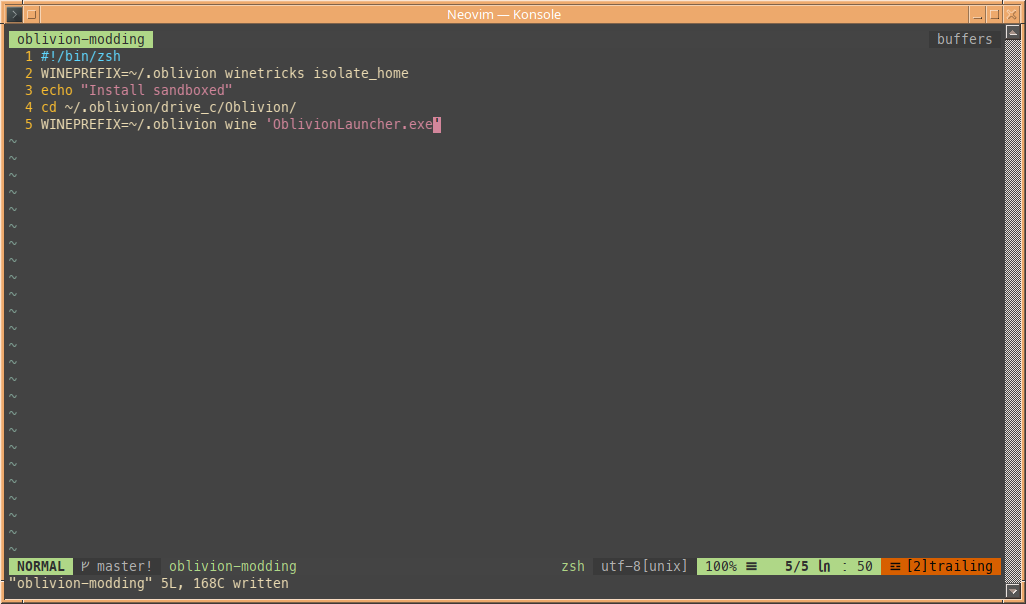
The line with echo is for my own purposes, you don’t need it.
After that is done, exit out.
Now that we have a script we need to be able to execute it.
Most file managers should have everything we need. Right click the file and go to details or something similar.
Go to a permissions tab and check the box that says executable or something similar.
If that isn’t there, we can just do it in the terminal. Open the terminal where the file is, then enter chmod +x 'your script' replacing ‘your script’ with your script and removing the single quotes.
This adds the executable permission to the file.
We run into a problem however, how do we use this?
The simplest way is to just run the script. Most file managers should have a right click option to run the command in a terminal or just as is.
We could make a shell alias so we only need to run a simple command.
While both of those ways work, you probably don’t want to do that.
Instead, there is a way to create our own application entries that an app menu can read.
XDG supplies the format and it works for practically any desktop environment.
Your dektop environment might even have a tool for it, I know that KDE does.
The fool proof way is to create a ‘app name’.desktop file in ~/.local/share/applications/ with something like the following contents:
[Desktop Entry]
Comment='a longer discription'
Exec='your script path'
GenericName='either a short discription or just a name'
Icon='some icon path'
Name=Oblivion
NoDisplay=false
StartupNotify=true
Terminal=0
TerminalOptions=
Type=Application
Save the file and it will appear in your application menu of choice. It might be a tad weird so you can edit the application by right clicking. Once that’s all set, run the game and everything should work at this point. There is more we want to do however.
4. Changing your DirectX 9 wrapper
WINE comes with a pretty good wrapper that takes DirectX 9 and converts it to OpenGL. It’s not perfect though and has quite a performance loss compared to running on Windows. Fortunately for us, there’s two other options we can use!
i. Gallium Nine
The first is Gallium Nine, which only works on AMD GPUs and Gen 9 or newer Intel GPUs.
Nvidia isn’t supported at all.
Gallium Nine isn’t exactly a wrapper. It allows a Gallium based GPU driver to directly translate DirectX 9 code as if it were OpenGL or Vulkan.
Performance is as good as Windows with this, and has a bit more in the non-game related DirectX 9 support.
For Oblivion, I prefer it over other solutions that we will discuss later.
Installing Gallium Nine is very simple. Some distros have it in the package managers, simply install it through that (look in the link).
If your distro doesn’t, you can install the latest version with Winetricks.
Open up Wintricks in your WINEPREFIX like so: WINEPREFIX='your prefix' winetricks.
Click “Ok” then click the first option “Install Windows DLL or Component” and hit ok.
Scroll down until you see this:
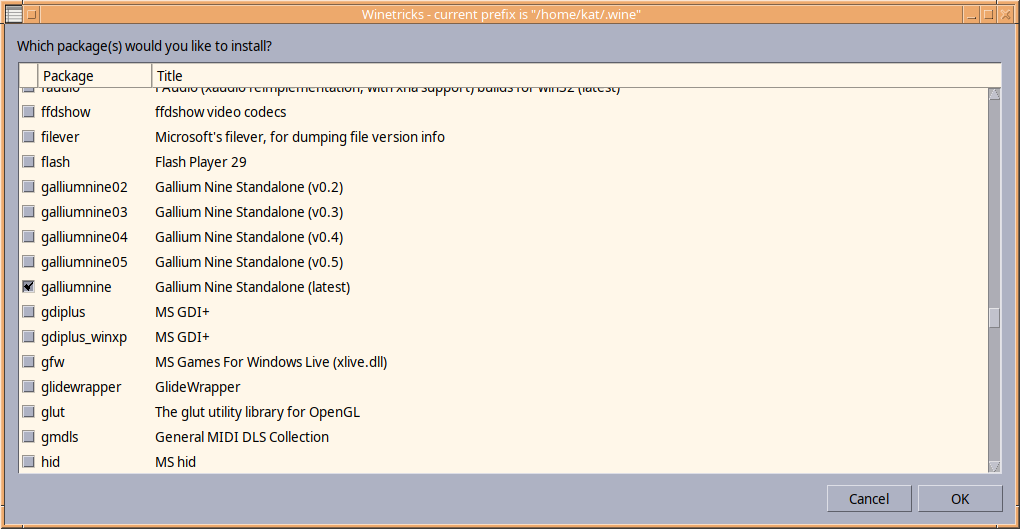
Check the box then hit ok. This installs Gallium Nine. To enable it, you need to run a command:
WINEPREFIX='your prefix' wine ninewinecfg
This will open up a config box:
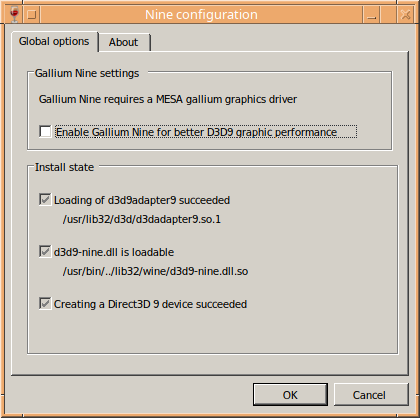
Check the top box and Gallium Nine is enabled!
ii. DXVK
The other DirectX 9 wrapper is DXVK (formerly just D9VK).
DXVK takes DirectX 9 through 11 code and translates it Vulkan.
This wrapper works with any Vulkan capable GPU; any AMD GPU since GCN, any Nvidia GPU since Kepler, and any Intel GPU since Intel HD 4000.
This wrapper is standalone, and installs through a simple script.
Download the latest release on the GitHub page, extract it to some directory, and cd into the directory.
From that directory, we need to run two commands:
       export WINEPREFIX='your prefix'
       ./setup_dxvk.sh install
The wrapper is installed and enabled by default! There’s nothing else you need to do. AMD users might be aware of ACO, a new Vulkan shader compiler for AMD GPUs. Since Mesa version 19.3, it can be enabled with a simple environment variable. While this does increase performance in many situations, it seems to be broken with any ENB dll installed. I simply can’t recommend it for Oblivion (and any game where ENB is desired). If you wish to use it, look up how to do it yourself. I can’t support it until it’s fixed.
5. Audio
If you haven’t already, start up Oblivion to the main menu. If you hear music you’re good to go and can skip this section. If not, well you’re in for a fun time. Audio is an annoying topic when it comes to WINE, Oblivion in particular. MP3 support isn’t neccessarily a guarantee when you install your distro. This is because of two things: you don’t have the requisite mp3 library installed and/or you’re using gstreamer as your audio backend which doesn’t some with MP3 support out of the box. Many distros will use gstreamer so you’re going to need to install some things. For generic mp3 support, you need the mpg123 library. WINE builds against this, but you still need to have the libraries. Open your package manager and search for “mpg123”. Install that and “lib32-mpg123” if it’s not installed. If you just installed it, see if audio works for you now. If it does, you’re all set. If not, continue. Search for “gst-plugins” in your package manager. Some distros won’t install these by default. Install “gst-plugins-good” and “lib32-gst-plugins-good” for MP3 support and whatever dependencies it relies on. This should fix audio for Oblivion now.
6. Closing Words
This is just an installation guide, so modding is kind of up in the air. If you install OBSE, install it normally and change your application script to run the loader instead of the Oblivion Launcher. I do have plans for a modding guide for Oblivion on Linux. It requires a good bit of setup and knowledge to work around limitations. That will be coming out at some point. I also hope that this guide was useful and thoughtful, I spent a lot of time seeing if I didn’t assume from my own knowledge. If you have questions or comments, either email me at katisntgood@gmail.com, message me on the Nexus, or open an issue on this site’s GitHub page. Of course if you’re reading this when I’ve added commenting feel free to just use that instead.
Posted: